I hope you are all having a fantastical relaxing weekend…and staying warm. Our temperatures around here have dropped down to around the 40’s which is MUCH too cold for Heather 🙁
Thank God for electric blankets!
AND for PANCAKES! 😀
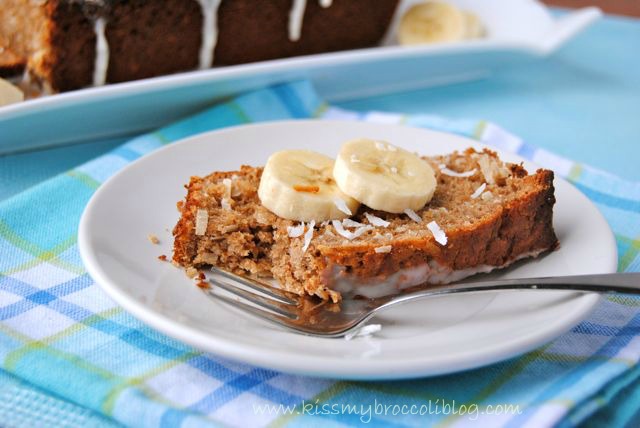
When I finished off the last slice of Coconut Banana Bread for breakfast the other day, I couldn’t help but still have the craving lingering around when it came time for lunch.
Obviously, there was only one thing left to do…
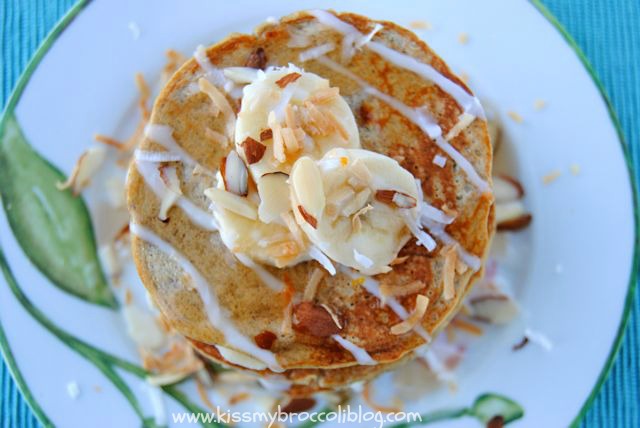
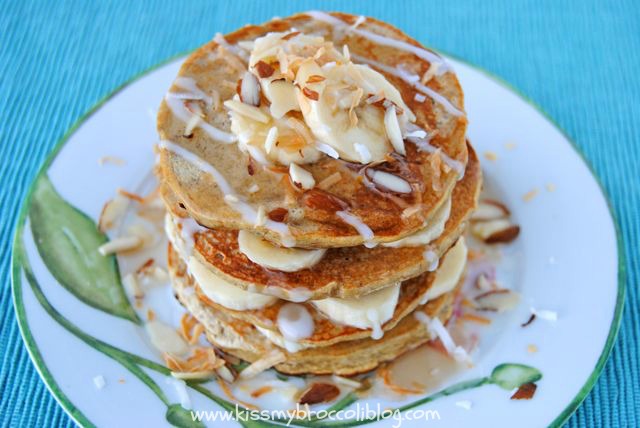
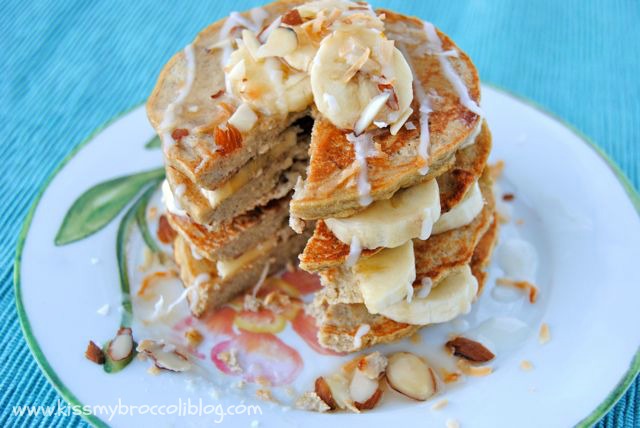
Ahh, pure happiness!
I was SO HAPPY with how these turned out.
The ingredient list is simple and in less than 15 minutes, I had a beautiful stack of coconutty-banana goodness before me.
Sweet, dense, and oh, so spongy!
Which means they’re PERFECT for soaking up warm drizzly
coconut butter and maple syrup!
Coconut Banana Pancakes
By: Heather @ Kiss My Broccoli
Prep Time: 2 minutes
Cook Time: 10-12 minutes
Keywords: fry breakfast dairy-free grain-free high fiber high protein gluten-free coconut flour bananas Pancake Sunday
Ingredients (Serves 1)
4 egg whites
1/2 large ripe banana, mashed
1/3 cup unsweetened almond milk
1/4 teaspoon almond extract (optional)
1/4 cup coconut flour
Instructions
1. Preheat a non-stick skillet or griddle to medium heat and coat with cooking spray.*
2. Whisk egg whites until frothy.
3. Add remaining ingredients and stir well.
4. Spoon batter onto skillet surface, forming 4 medium-sized pancakes, and allow to
cook 5-6 minutes per side before flipping.
5. Plate and layer with other half of banana, toasted coconut, and a drizzle of coconut butter.
*Do NOT skip this step as coconut flour-based pancakes have a tendency to stick
Just the other day, my co-worker was telling me about her venture to Publix and how much her little grandson was enjoying the trip.
After leaving the bakery, with a freshly baked sugar cookie, they headed over to the deli where they were able to sample some of the items on special that day. Her grandson took a slice of mozzarella cheese, wrapped it around his cookie, and continued right on munching.
If that’s not a contender for #strangebutgood, then
I don’t know what is!
Yep, when it comes to food, kids can be strange…they can also be pretty picky.
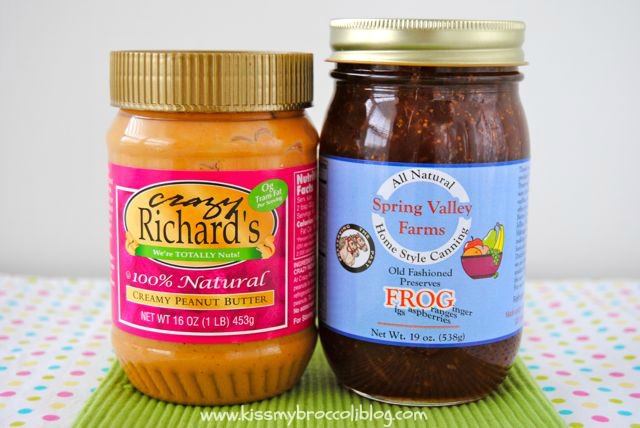
Unless of course, we’re talking peanut butter and jelly.
Raise your hand if you practically LIVED off this combo as a child. I remember one particular summer break where I had a PB&J for nearly every meal for a week straight!
But then, as my little childhood tastes evolved, I got to the point where all I ever wanted was chicken nuggets and I have a feeling I’m not alone. Whether it’s honey mustard, BBQ sauce, or sweet and sour sauce from a certain pair of golden arches, there’s just something about this dippable food that draws kids in.
Do you SEE where I’m going with this?
How about now?
But wait…it gets better stranger! 😉
Oh yeah, I went there.
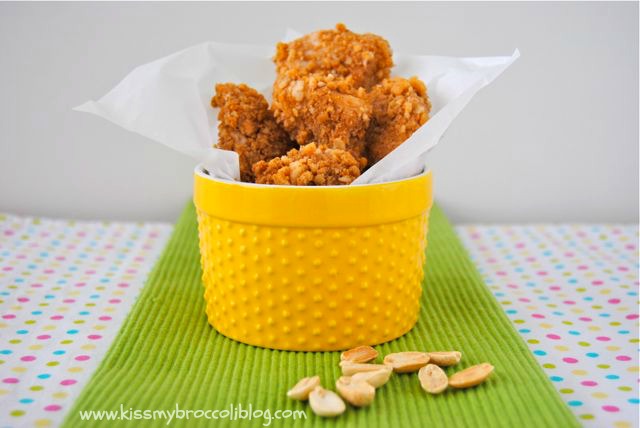
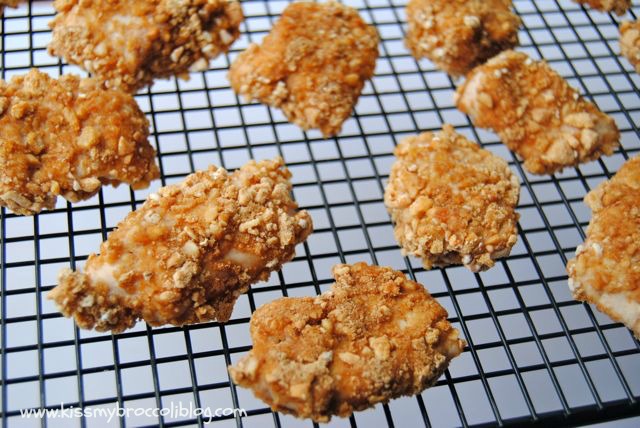
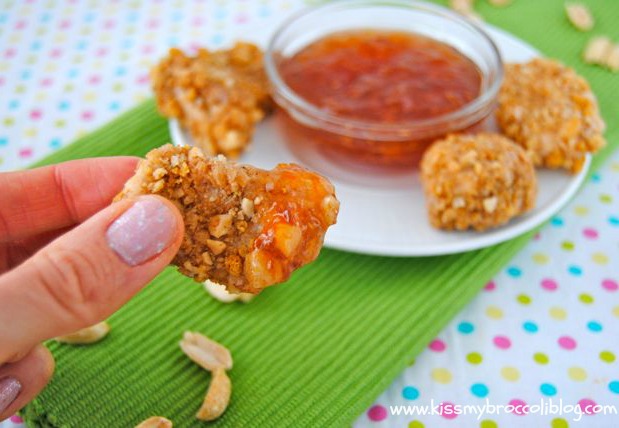
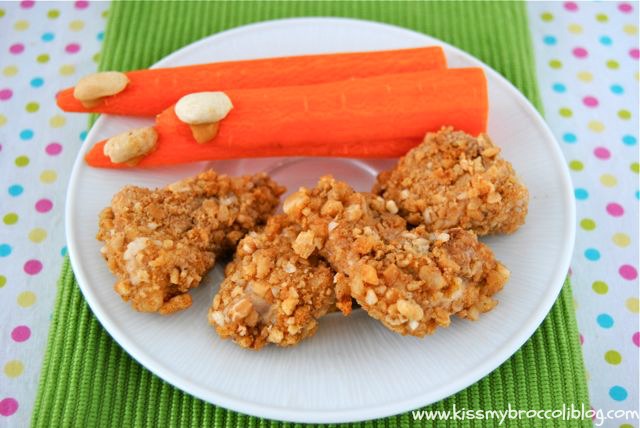
Crunchy peanut butter-coated nuggets with warm sticky jam dip…
Bring on the childhood nostalgia!
PB Chicken Nuggets with Jam Dip
By: Heather @ Kiss My Broccoli
Prep Time: 10-15 minutes
Cook Time: 15-20 minutes
Keywords: bake entrée high protein kid-friendly peanut butter chicken
1. Preheat oven to 350 degrees Fahrenheit.
2. Line a baking sheet with aluminum foil, spray with non-stick spray and set aside.
3. Place chicken breasts on a clean, dry cutting board, cover with plastic wrap and pound to about 2 inch thickness using the heel of your palm or a small skillet.
4. Cut chicken into nugget-sized pieces (about 8 per breast) and set aside.
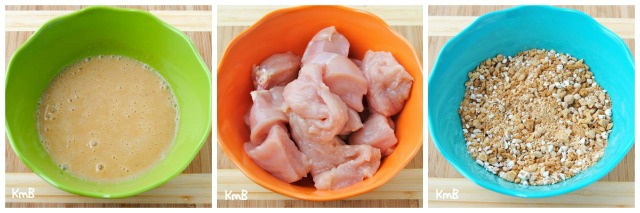
5. In a shallow bowl, combine egg whites, peanut butter, and honey and whisk until smooth.
6. In a separate shallow bowl combine crushed cereal, flour, and peanuts and stir to mix.
7. Dip each chicken nugget into the peanut butter mixture and then roll around in cereal mixture before placing on the prepared baking sheet.
8. Arrange pieces 2-3 inches apart and bake for 15-20 minutes or until juices run clear when pierced with a fork or knife.
9. Transfer immediately to a wire rack to cool.
10. Heat jam in a microwave-safe bowl for 15-20 seconds until thin, serve as a dip for nuggets.
Remember on Monday when I mentioned that I had ordered MORE of my new favorite maple syrup? Now let’s rewind a bit to the moment when I first discovered it!
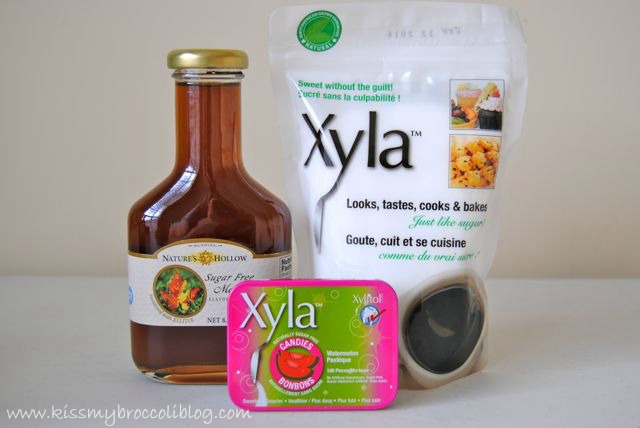
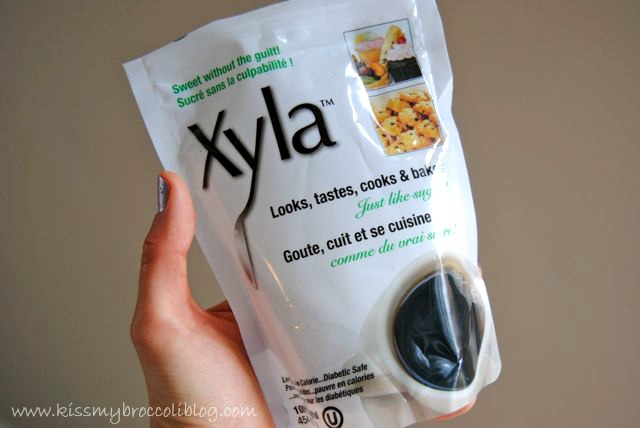
A few months ago, a representative from Xyla, one of the country’s leading producers of xylitol, contacted me about reviewing some of their products.
Not knowing much about the sugar-free sweetener, I asked a few questions and then did a little research on my own and here is what I found:
Xylitol is an all-natural sweetener derived from the fibrous plant material in many fruits and vegetables and it’s even found in corncobs.
Insulin is not required to break down xylitol in the body, which is great for diabetics looking for a substitute for sugar in their diets.
Xylitol has many dental benefits including fighting cavities!
Our bodies naturally produce xylitol on a daily basis.
Xylitol looks like sugar, tastes like sugar, but has one THIRD fewer calories.
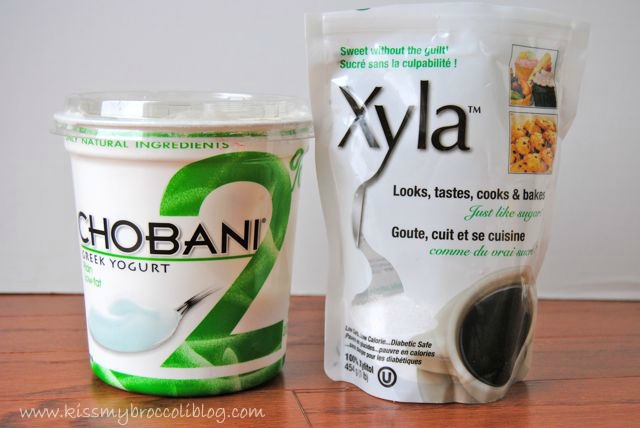
After getting a bit excited over my new-found xylitol knowledge, I agreed to review a few products for the company.
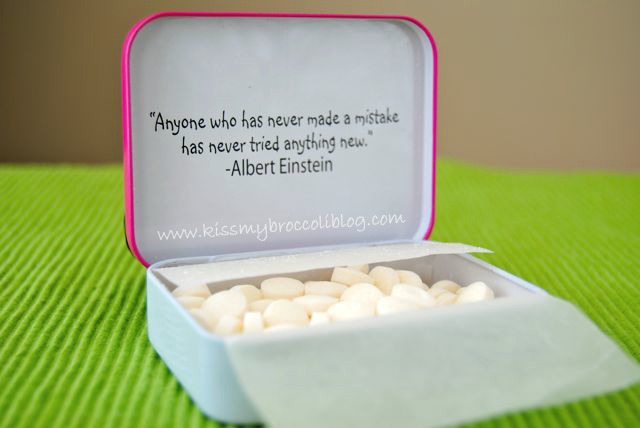
I was sent a bottle of their maple syrup (specifically requested for OBVIOUS reasons) and a bag of pure granulated xylitol. They also threw in some watermelon-flavored candies.
I tried the them out right away and was pretty impressed with the flavor…
and just like they said, no funny aftertaste!
When I tried the syrup, I was a little unsure about it at first since I’m used to the super thick consistency of pure maple syrup, but once I drizzled it over my first pan-COOKIE?
Yeah, that bottle went FAST! Hence the reason for the recent replenishing! 😉
As for the xylitol itself…I wasn’t really sure what I should do with it.
It’s no secret, I’m no Betty Crocker, but I wanted to make the most of the sample that I had and I wanted a good basis to judge it off of.
About that time THIS arrived on my doorstep:
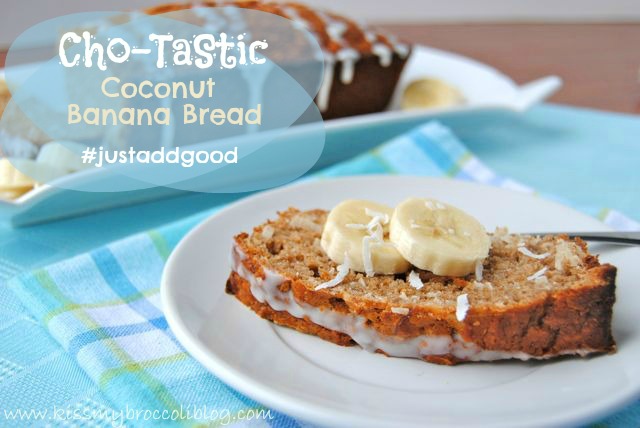
Well, HELLO Cho!
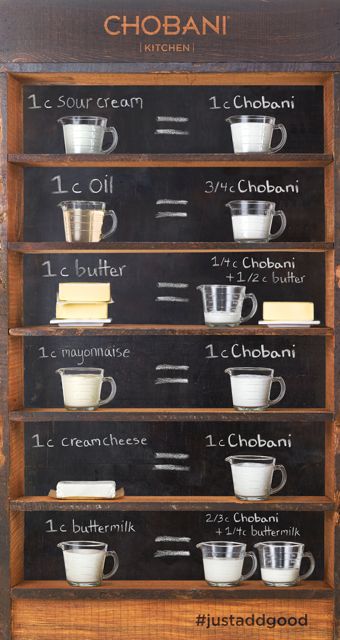
Along with their new campaign to Just Add Good, Chobani sent me a case of their 16oz tubs to help “inspire” me…and it couldn’t have come at a better time!
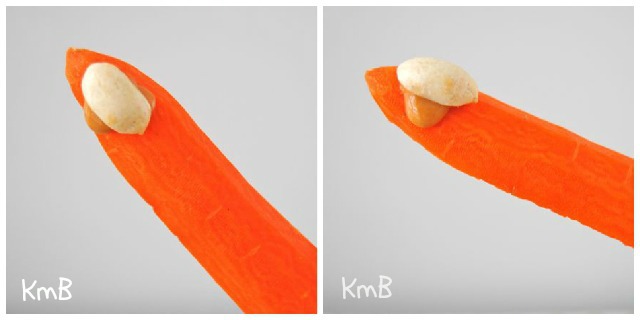
Once I saw this amazing conversion chart, I knew EXACTLY what to do!
1 Tablespoon coconut butter, melted for drizzling overtop (optional)
Instructions
1. Preheat oven to 350 degrees Fahrenheit and coat a 9×5 loaf pan with non-stick spray.
2. In a large bowl, combine flour, baking powder, salt, and cinnamon.
3. In a separate bowl, use an electric mixer to beat eggs and xylitol until light in color.
4. Add Chobani, vanilla, and banana, and stir until combined.
5. Add wet ingredients to dry ingredients and stir until flour is incorporated.
6. Fold in shredded coconut.
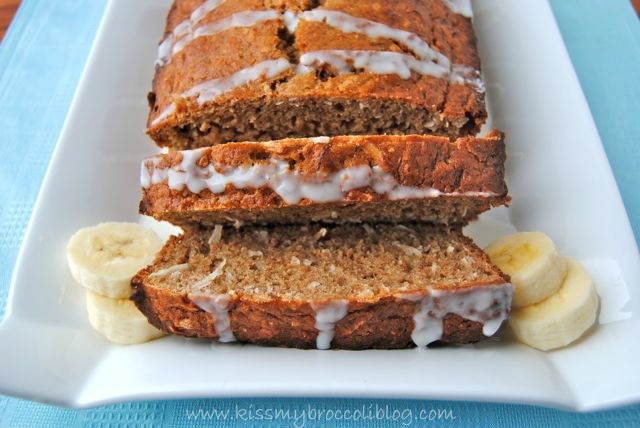
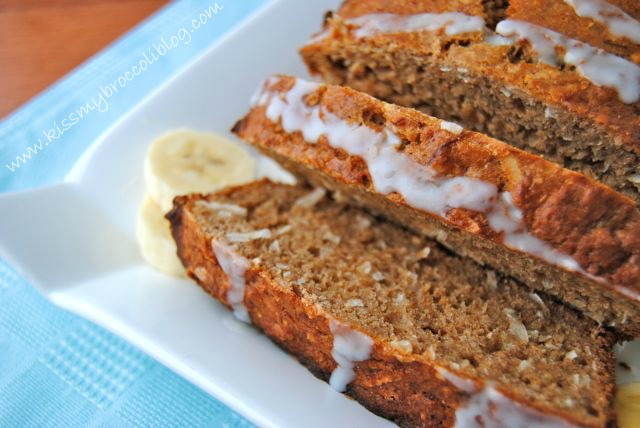
7. Transfer batter to a loaf pan and bake for 55-60 minutes or until the top of the bread is golden brown and a toothpick inserted into the center of the loaf comes out clean.
8. Remove from oven and allow to cool for at least 10-15 minutes before drizzling with melted coconut butter.
9. Slice, serve, and smile!
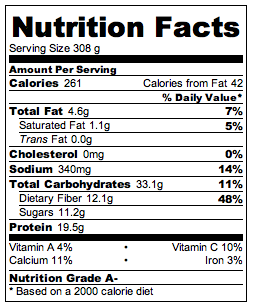
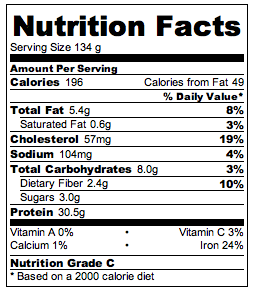
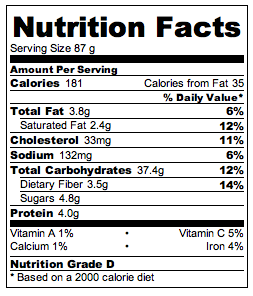
Now, may I have a drumroll for the nutritional stats?
Each slice without coconut butter (sad to think one would do such a thing) drizzle comes out toooooooo…
How ya like ‘dem cokernuts? 😉
Oh I LIKE them…
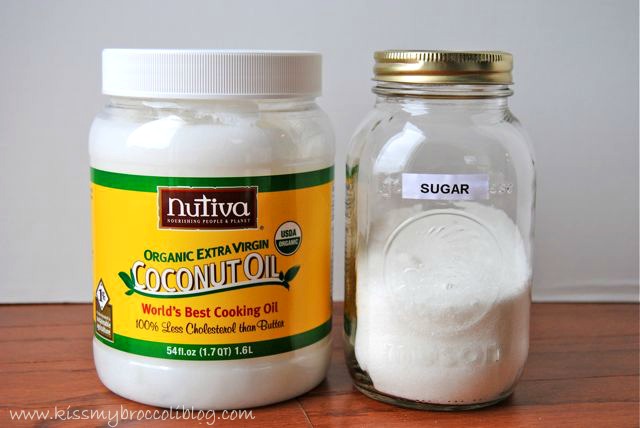
So much so that I’ve already made TWO loaves in the last week! I’m telling you guys, this is BY FAR the BEST banana bread I have ever tasted! The flavor combination of the banana and coconut is amazing and the fact that there is no oil OR sugar?
Total bonus!
I was sent products from Xyla and Chobani free of charge but all of the opinions expressed in this post are of my own.
My name is Heather! I'm a southern gal with a passion for food, fitness, and photography...and alliteration if you didn't notice! Here you'll find a mix of random musings, delicious recipes, and hopefully a chuckle or two! Check out my "About' tab to learn more!